
All articlesrental property inspection

Rental Property Move-Out Inspection Checklist: A Complete Guide

Inspectra AI Team October 9, 2026 10 min read
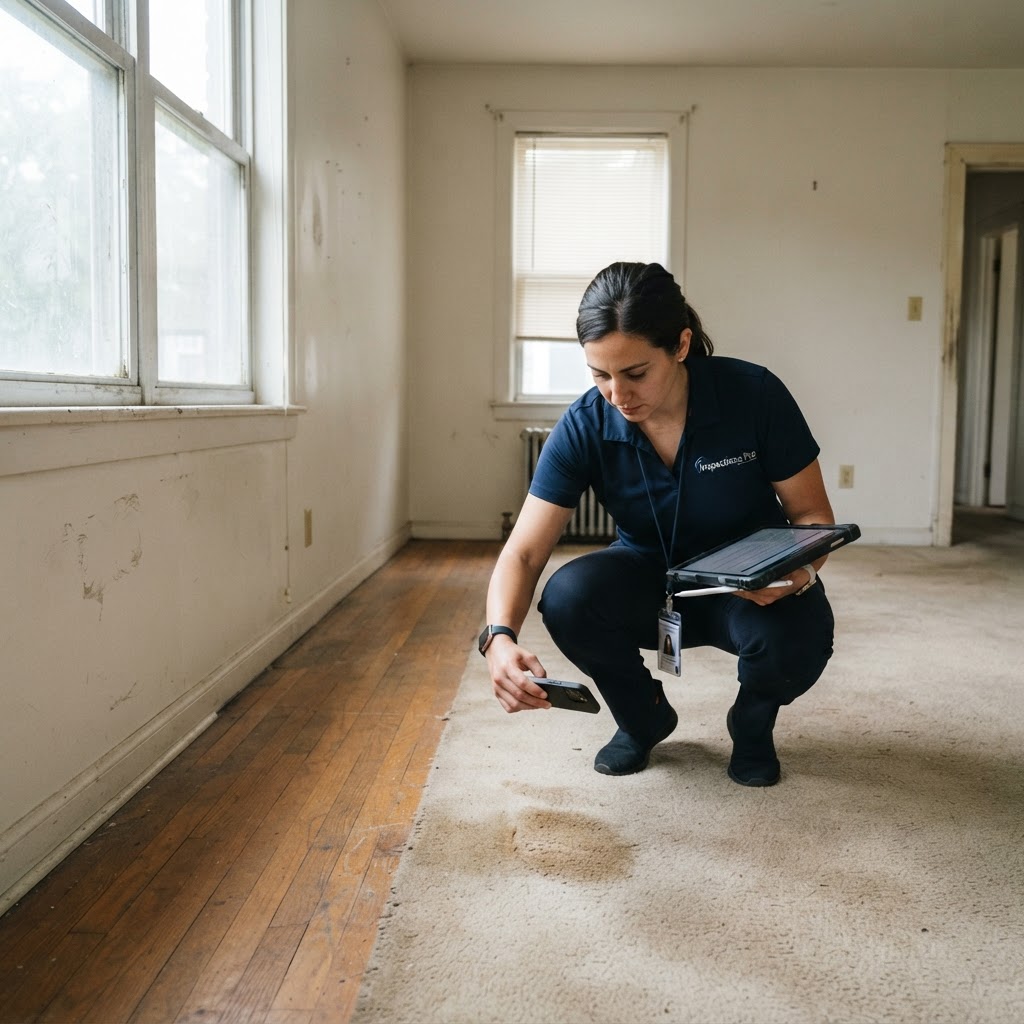
A move-out inspection is a systematic walkthrough conducted at the end of a tenancy to document the property's condition, compare it against the move-in report, and determine whether any deductions from the security deposit (called a bond in Australia) are warranted. Done correctly, it protects both landlord and tenant, reduces tribunal disputes, and creates a defensible paper trail.

Key takeaways

  • Move-out inspections should be conducted within 24–72 hours of a tenant vacating, before any cleaning or repairs begin.
  • In Australia, residential tenancy legislation (e.g. the Residential Tenancies Act 2010 in NSW) requires landlords to return bonds within 14 days unless a claim is lodged.
  • In the US, most states require landlords to return deposits within 14–30 days with an itemised deduction statement.
  • In the UK, the Tenancy Deposit Scheme (TDS) requires disputes to be raised within 10 days of the tenancy end date.
  • A photo-documented move-out report paired with a move-in condition report is the single strongest evidence in tenancy deposit disputes.

Why move-out inspections go wrong

The most common failure in move-out inspections is inconsistency — inspectors either rush through, miss hidden areas, or use vague language like "worn" or "dirty" without measurable context. Tribunals and adjudicators consistently reject claims that lack date-stamped photos, precise location descriptions, and a direct comparison to the move-in condition report.

A structured checklist prevents this. It also ensures compliance with jurisdiction-specific notice requirements: in Victoria, landlords must give tenants at least 24 hours' written notice before a routine inspection; in California, tenants have the right to be present at the final walkthrough.

Before you start: preparation steps

Before walking through the door, complete these steps:

  1. Retrieve the original move-in condition report — this is the baseline. Without it, proving damage beyond fair wear and tear is almost impossible.
  2. Confirm the tenancy end date and key return — ensure possession has formally transferred.
  3. Check jurisdiction notice requirements — give written notice if required.
  4. Prepare your tools — torch, moisture meter, camera (minimum 12MP), checklist app or paper form.
  5. Invite the tenant — joint inspections reduce disputes. In some US states (e.g. California, under Civil Code §1950.5), tenants have a statutory right to attend.

Fair wear and tear vs. damage: understanding the distinction

Fair wear and tear refers to the gradual, reasonable deterioration of a property through normal use — faded paint after five years, minor carpet flattening, small scuffs on skirting boards. Damage is deterioration caused by negligence, misuse, or accident — burns, stains, holes, pet scratches. This distinction is central to any deposit deduction and is the first thing a tribunal will assess.

A useful rule of thumb: if the damage existed on the move-in report, it cannot be claimed at move-out. If it worsened beyond expected ageing, only the excess deterioration is claimable.

The move-out inspection checklist

Work room by room, systematically, from front door to back yard. Document every item with at least one photograph and a written observation.

Entry and hallways

  • [ ] Front door lock, handle, and deadbolt function correctly
  • [ ] Door frame and threshold — no impact damage or missing paintwork
  • [ ] Walls — note any holes, scuffs, or unapproved paint colours
  • [ ] Light switches and power outlets — present, functional, no cracked faceplates
  • [ ] Flooring — check for stains, scratches, lifted edges, or missing tiles
  • [ ] Smoke alarm — present, functional, and within service date (AS 3786 in Australia; BS 5839-6 in the UK)

Living areas

  • [ ] Walls and ceilings — cracks, water stains, mould, unapproved fixtures
  • [ ] Windows — glass intact, locks functional, flyscreens present and undamaged
  • [ ] Blinds or curtains — present, functional, not torn or broken
  • [ ] Light fittings — globes present, no damage
  • [ ] Flooring — carpet stains, timber scratches, vinyl lifting
  • [ ] Fireplace or heater (if applicable) — clean, no damage
  • [ ] Air conditioning unit — filters cleaned, remote present, no damage

Kitchen

  • [ ] Benchtops — no burns, chips, or cuts beyond normal use
  • [ ] Splashback — grout condition, cracked tiles
  • [ ] Sink — no chips, stains, or blocked drain
  • [ ] Tap ware — functional, no dripping, no calcium build-up that suggests neglect
  • [ ] Rangehood — filters cleaned, fan functional
  • [ ] Oven and cooktop — clean, all burners/elements working, oven door seals intact
  • [ ] Dishwasher (if provided) — clean interior, no standing water, door seal intact
  • [ ] Refrigerator (if provided) — clean interior and coils, no mould in seals
  • [ ] Cupboards and drawers — clean internally, hinges functional, no damage

Bathrooms and laundry

  • [ ] Bath and shower — no mould beyond superficial, no chips or cracks in enamel
  • [ ] Shower screen or curtain — clean, no mould on seals, glass intact
  • [ ] Toilet — clean, cistern functional, seat intact
  • [ ] Vanity and basin — clean, no chips, tap ware functional
  • [ ] Exhaust fan — functional and clean
  • [ ] Tiles and grout — mould, cracked or missing grout
  • [ ] Mirror — intact, no water damage to backing
  • [ ] Laundry tub and tap ware
  • [ ] Washing machine connections — hoses intact, no leaks (check surrounding flooring for moisture)

Bedrooms

  • [ ] Walls and ceilings — as per living areas
  • [ ] Built-in wardrobes — clean interior, shelving intact, doors functional
  • [ ] Windows and flyscreens
  • [ ] Flooring — carpet, timber, or tiles
  • [ ] Ceiling fan (if present) — functional, blades clean

Garage, shed, and external areas

  • [ ] Garage door — remote present, mechanical operation smooth
  • [ ] Garage floor — oil stains, paint damage
  • [ ] Garden — lawns mowed, garden beds weeded, plants alive (if tenant was responsible for maintenance)
  • [ ] Fences — no broken palings or panels
  • [ ] Letterbox — intact, number present
  • [ ] Outdoor taps and hoses
  • [ ] Pool or spa (if applicable) — water clarity, equipment functional, safety fence compliant with AS 1926.1
  • [ ] Paths and driveways — no cracking beyond normal ageing

Utilities and compliance items

| Item | Check | Standard | |---|---|---| | Smoke alarms | Functional, within service date | AS 3786 (AU), BS 5839-6 (UK), NFPA 72 (US) | | Carbon monoxide alarms | Present if gas appliances installed | AS 7240 (AU), BS EN 50291 (UK) | | RCD/safety switches | Test button functions | AS/NZS 3000 (AU) | | Gas appliances | No smell, pilot lights functional | — | | Meter readings | Document electricity, gas, water readings | — | | Keys and access devices | All sets returned, including remotes | — |

Documenting the inspection: best practice

Documentation quality determines whether you win or lose a bond dispute. Follow these principles:

Photographs

  • Shoot wide (context) then close (detail) for every defect.
  • Ensure date and time stamps are enabled on your device.
  • Photograph all four walls of every room, even if no defects are found — this proves the absence of damage.
  • Use a scale reference (ruler, coin) next to any damage measurement.

Written notes

  • Use precise language: "10cm × 4cm burn mark on kitchen benchtop, 30cm from sink, not present on move-in report dated 12 Jan 2023" rather than "damaged benchtop."
  • Note the specific location within the room — adjudicators cannot assess a photo without context.

Comparison to move-in report

  • Flag every line item where current condition differs from the baseline.
  • Annotate changes clearly: "Deterioration beyond fair wear and tear" or "Consistent with fair wear and tear — no claim."

Tools like Inspectra AI allow inspectors to capture photos, voice notes, and field observations on-site, then auto-generate a structured, professional report with all comparisons built in — eliminating the manual write-up step that causes delays and errors.

After the inspection: next steps

Issuing the report

Send the completed report to the tenant within the timeframe required by your jurisdiction:

  • Australia (NSW): bond claim must be lodged with NSW Fair Trading if disputed; landlord should issue report promptly.
  • UK: raise any deposit dispute through the relevant TDS within 10 days of the tenancy end date.
  • US: most states require an itemised deduction statement sent within 14–30 days of move-out.

Calculating deductions

Deductions must reflect the actual cost of restoring the item, adjusted for depreciation. A 10-year-old carpet that was already 7 years old at move-in cannot be claimed at full replacement value — only the proportional remaining useful life is claimable. Using a depreciation schedule is considered best practice by tribunals in all three jurisdictions.

Repair and re-let timeline

Once the report is issued and deductions settled, prioritise:

  1. Deep clean (1–2 days)
  2. Trade repairs for any structural or mechanical defects (1–5 days depending on scope)
  3. Cosmetic touch-ups — painting, carpet cleaning (1–2 days)
  4. Re-inspection before re-listing

A well-documented move-out report also speeds up this process by giving trades a clear, itemised scope of work rather than a verbal brief.

Frequently Asked Questions

How long does a move-out inspection take?

For a standard 2–3 bedroom property, a thorough inspection takes 45–90 minutes when conducted properly with photo documentation. Larger properties or those with significant damage may take 2–3 hours. Rushing to complete an inspection in under 30 minutes is one of the most common causes of missed defects and disputed reports.

Can a landlord charge for professional cleaning at move-out?

Yes, but only if the property was professionally cleaned at the start of the tenancy (evidenced by a receipt) or if the tenant left the property in a state requiring professional cleaning beyond normal use. Most Australian tenancy legislation now prohibits mandatory professional cleaning clauses, though the standard of cleanliness on vacating must still match move-in condition.

What happens if there was no move-in condition report?

Without a baseline condition report, it is very difficult for a landlord to prove damage is attributable to the tenant rather than pre-existing. In many jurisdictions, the absence of a move-in report effectively prevents any bond deduction claim. This is why preparing a detailed condition report at the start of every tenancy is non-negotiable.

Is the tenant entitled to a copy of the move-out report?

In most jurisdictions, yes. In Australia, tenants can request a copy of any inspection report. In the UK, the report forms part of the evidence in any TDS dispute. In the US, tenant rights vary by state, but providing a copy is considered best practice and reduces the likelihood of formal disputes.

What is the difference between a routine inspection and a move-out inspection?

A routine inspection is conducted during a tenancy (typically every 3–6 months) to check general maintenance and compliance. A move-out inspection is a formal, comprehensive assessment conducted at tenancy end to determine the condition of the property against the move-in baseline and calculate any bond deductions. Move-out inspections require a higher standard of documentation.

How should mould found at move-out be assessed?

Mould caused by inadequate ventilation habits (e.g. not running the exhaust fan, drying washing indoors without ventilation) may be attributable to the tenant. Mould caused by structural defects — roof leaks, rising damp, inadequate waterproofing — is the landlord's responsibility. An inspector should use a moisture meter to determine whether the source is structural or behavioural before making any claim.

Bottom line

A well-executed move-out inspection is the difference between a clean tenancy transition and a drawn-out dispute. Use a structured, room-by-room checklist, document everything with date-stamped photos, and always compare findings against the original move-in condition report. Meeting jurisdiction-specific timeframes for issuing reports and lodging bond claims is equally important.

If you want to cut report preparation time and improve documentation quality, start a free trial with Inspectra AI — capture your inspection on-site and receive a professional, comparison-ready report without hours of manual writing.

Draft inspection reports in minutes

Inspectra AI turns your photos and field notes into client-ready reports — with human approval at every step.