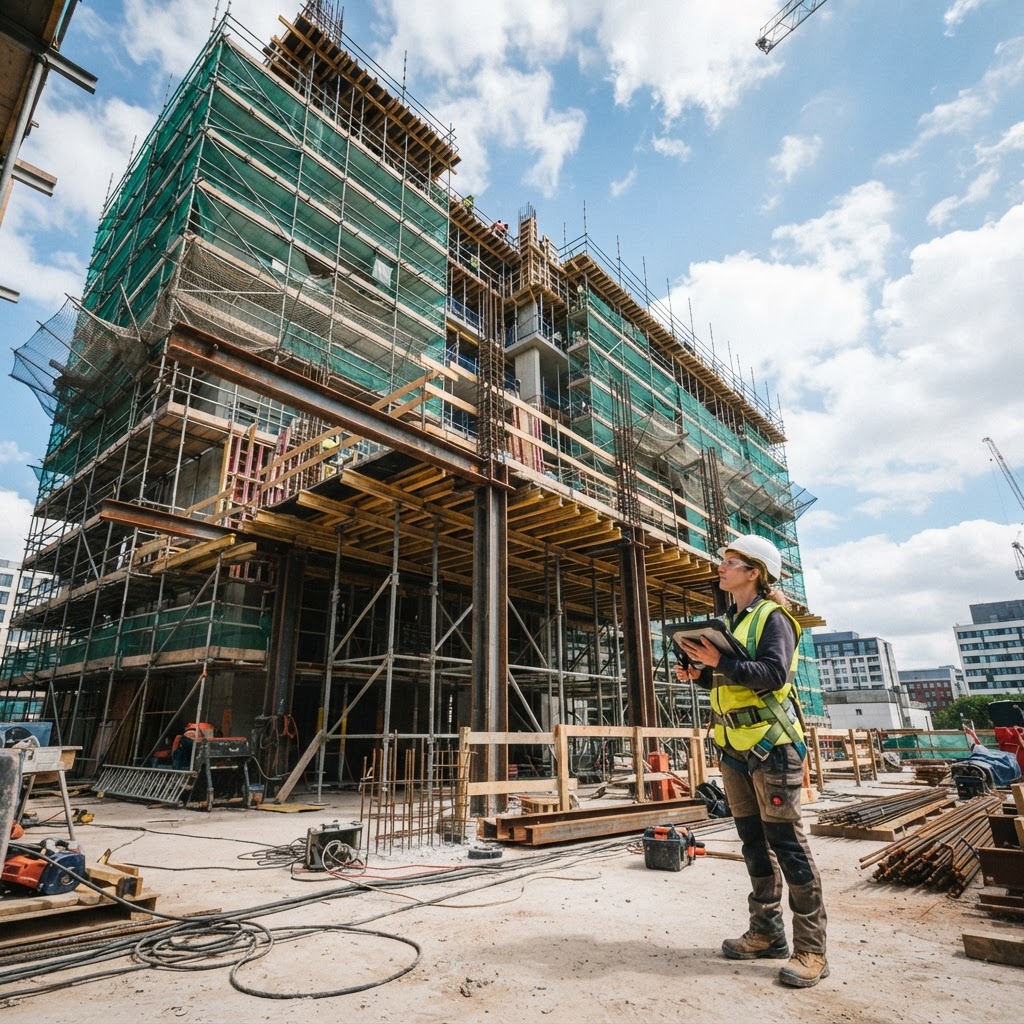
A construction site safety inspection is a structured, documented walkthrough of an active or partially complete worksite to identify hazards, verify compliance with applicable safety standards, and record conditions before they become costly defects or liability events. Conducted properly, a site safety inspection typically takes 45 minutes to 3 hours depending on site scale, and its findings form a legally defensible record for contractors, insurers, and regulators alike.
Key takeaways
- A construction site safety inspection should be conducted at minimum weekly on active sites, and before and after any high-risk work phase (e.g. concrete pours, structural steel erection, electrical rough-in).
- Relevant standards include AS/NZS 4801 (Australia), OSHA 29 CFR 1926 (United States), and CDM Regulations 2015 (UK) — knowing which applies to your site is the first step.
- The most cited hazards in construction fatalities globally are falls from height, struck-by incidents, electrocution, and caught-in/between machinery — these four categories should anchor every inspection.
- Photographic and voice-note evidence collected in the field is the most defensible documentation format; handwritten notes alone are routinely challenged in disputes.
- Digital tools like Inspectra AI can convert raw field photos and voice observations into structured, professional reports in minutes, reducing admin time by up to 70%.
What a Construction Site Safety Inspection Actually Covers
Before walking onto a site, it helps to understand the scope. A construction site safety inspection is broader than a building defect inspection — it evaluates active conditions: how work is being performed, what equipment is in use, whether safe work method statements (SWMS) are being followed, and whether the physical environment poses risk to workers or the public.
The inspection typically spans six domains:
| Domain | What You're Assessing |
|---|---|
| Site access and perimeter | Hoarding, fencing, signage, unauthorised entry risks |
| Scaffolding and fall protection | Compliance with height regulations, edge protection |
| Electrical safety | Temporary power boards, RCD protection, cable management |
| Plant and equipment | Pre-start checks, exclusion zones, operator credentials |
| Hazardous materials | Storage, labelling, SDS availability, disposal |
| Housekeeping and fire risk | Waste accumulation, flammable materials, exit paths |
Step 1: Pre-Inspection Preparation
Arriving on site without preparation wastes time and risks missing critical items. Before you leave the office or vehicle:
Review relevant documentation
- Obtain the current Safe Work Method Statements (SWMS) for high-risk construction work — in Australia, SWMS are legally required under the Work Health and Safety Regulations 2017 for 18 specific high-risk activities.
- Review any previous inspection reports, non-conformance notices, or incident reports for the site. Recurring issues are a red flag.
- Confirm the applicable regulatory framework: AS/NZS 4801 and the relevant state WHS/OHS Act in Australia; OSHA 29 CFR 1926 Subparts C–Z in the US; CDM Regulations 2015 and BS OHSAS 18001 in the UK.
Prepare your inspection kit
- PPE appropriate to the site (hard hat, hi-vis vest, steel-capped boots, safety glasses as minimum).
- Smartphone or tablet with camera capable of geotagged photography.
- Inspection checklist (digital preferred — paper checklists can become illegible or damaged on site).
- Tape measure and torch for confined or low-light areas.
- A voice recorder or dictation app — narrating observations in real time while your hands are occupied is faster and more accurate than note-taking.
Brief the site supervisor
Always notify the site supervisor or principal contractor before beginning. This is not merely courtesy — under CDM 2015 in the UK, the Principal Designer and Principal Contractor have specific duties to facilitate inspections. In Australia, the person conducting a business or undertaking (PCBU) has a duty to cooperate with WHS inspectors.
Step 2: Site Perimeter and Access
Begin your inspection before you enter the main work zone.
- Hoarding and fencing: Is the perimeter secured against unauthorised entry, particularly by children? Fencing should be a minimum 1.8 m high on most Australian and UK sites.
- Signage: Emergency contact numbers, site rules, PPE requirements, and hazard warnings must be posted at all entry points.
- Traffic management: Are pedestrian and vehicle paths clearly separated? Is there a flagging or spotting arrangement near active plant movements?
- Site amenities: Adequate toilets, first aid kit with a current inspection record, and a muster point should all be verifiable within 2 minutes of entry.
Note any deficiencies with photographs. A photograph showing the absence of a required sign — or a sign obscured by construction material — is far more compelling in a non-conformance report than a written description.
Step 3: Scaffolding and Fall Protection
Falls from height account for approximately 30% of construction fatalities in Australia and the US annually. This is the highest-risk category in most inspections.
What to check on scaffolding
- Scaffold tag system: In Australia, scaffolding must display a current tag (green = safe, red = do not use) signed by a licensed scaffolder after each inspection. In the UK, the Work at Height Regulations 2005 require scaffolding to be inspected every 7 days and after any event that may have affected stability.
- Bracing and ties: Count the tie frequency against the scaffold manufacturer's specification or AS/NZS 1576.
- Planking: No gaps greater than 25 mm between adjacent boards; no overhang less than 150 mm or more than 4 times the plank thickness.
- Guardrails and toe boards: Top rail at 900–1100 mm height; mid-rail present; toe board minimum 150 mm high.
- Access: Proper ladder access at regular intervals — no climbing on cross-bracing.
Edge protection and floor openings
- All floor openings greater than 225 mm must be covered or guarded.
- Roof edges without scaffolding require static lines or safety mesh compliant with AS/NZS 4994 or equivalent.
Step 4: Electrical Safety
Temporary electrical installations on construction sites are a leading cause of both electrocution fatalities and site fires.
- Residual current devices (RCDs): Every temporary power outlet on an Australian construction site must be protected by an RCD rated at 30 mA or less under AS/NZS 3012. In the US, OSHA 1926.404 requires GFCI protection on all 120V, 15A and 20A outlets. In the UK, 110V centre-tapped-to-earth (CTE) systems are standard on most sites.
- Cable management: Extension leads should not cross vehicle or pedestrian paths without protection; no cable should show visible damage, repair with tape, or improvised joins.
- Temporary distribution boards: Must be enclosed, clearly labelled, and protected from water ingress — check that covers are in place.
- Portable appliance testing (PAT): Verify that portable tools bear a current test tag. In Australia, test frequency on construction sites is every 3 months.
Step 5: Plant, Equipment, and Exclusion Zones
For any operating plant — excavators, concrete pumps, cranes, elevated work platforms (EWPs) — verify the following:
- Operator licences: In Australia, operating a crane, EWP, or forklift requires a High Risk Work (HRW) licence under WHS Regulations. Ask to see it.
- Pre-start records: A completed pre-start checklist should be filed for every shift. Absence of records is itself a notifiable deficiency.
- Exclusion zones: A clearly marked exclusion zone around operating plant is required. For cranes, the drop zone must be calculated from the load weight and height.
- Reversing management: A spotter or audible reversing alarm is required for vehicles operating near workers on foot.
Step 6: Hazardous Materials and Substances
- Safety Data Sheets (SDS): Under the Globally Harmonised System (GHS) — now adopted in Australia (Safe Work Australia), the US (OSHA HazCom 2012), and the UK (REACH and CLP Regulation) — an SDS must be accessible on site for every hazardous substance in use.
- Storage: Flammable liquids must be stored in approved flammable goods cabinets, away from ignition sources and within bunded areas if over threshold quantities.
- Asbestos: On any pre-2004 structure in Australia or pre-2000 in the UK, assume asbestos-containing materials (ACMs) may be present until proven otherwise. An asbestos register and management plan must be on site.
- Silica dust controls: Engineered stone and concrete cutting operations require wet-cutting methods or on-tool extraction to comply with the respirable crystalline silica (RCS) exposure standard of 0.05 mg/m³ (8-hr TWA) in Australia since 2020.
Step 7: Housekeeping and Fire Risk
Poor housekeeping is consistently among the top three site deficiencies in WHS regulator audit data.
- Waste management: Combustible waste (timber offcuts, cardboard, packaging) should be removed from work areas daily. Do not allow accumulation near electrical installations.
- Walkways: All designated walkways must be clear of trip hazards, including protruding rebar — rebar ends must be capped or bent.
- Fire extinguishers: Check placement (within 30 m of any work area as a general rule), inspection tags, and accessibility.
- Emergency exits: All emergency egress routes must be unobstructed at all times, even during active work phases.
Step 8: Documenting and Reporting Findings
The inspection is only as valuable as the report it generates.
In the field
- Photograph every deficiency from multiple angles where possible. Include a reference object (tape measure, hi-vis cone) for scale.
- Use voice notes to narrate context that photos cannot capture: "This RCD board has no cover; the board is on the eastern elevation, Level 2, adjacent to the hoist landing."
- Note exact locations using grid references, floor levels, or GPS coordinates.
Structuring the report
A professional inspection report should include:
- Executive summary — overall risk rating (Critical / High / Medium / Low), number of deficiencies by category.
- Deficiency schedule — each item with photo, location, applicable standard breached, and recommended corrective action.
- Compliance matrix — a table mapping each inspected category to a pass/fail/not applicable status.
- Sign-off — inspector credentials, date, and a statement that the report reflects conditions at the time of inspection only.
Platforms like Inspectra AI are built specifically for this workflow — you capture photos and voice notes on site, and the AI structures them into a formatted, professional report ready for human review and sign-off. For inspectors handling multiple sites per day, this can reduce report writing time from 2–3 hours to under 30 minutes.
Step 9: Issuing Non-Conformances and Follow-Up
Findings must be graded by severity and assigned to a responsible party with a clear deadline:
| Severity | Definition | Required Response Time |
|---|---|---|
| Critical | Imminent risk of death or serious injury | Immediate cessation of affected work |
| High | Significant regulatory breach, high injury potential | 24 hours |
| Medium | Non-compliant condition, moderate risk | 7 days |
| Low | Minor housekeeping, administrative gaps | 14–30 days |
Follow-up inspections should be scheduled to verify corrective actions have been implemented. Unverified close-outs are a common gap in site safety management systems.
Frequently Asked Questions
How often should a construction site safety inspection be conducted?
At minimum, a formal documented inspection should occur weekly on active sites. Additionally, inspections should be triggered before and after high-risk work phases (such as structural steel erection or concrete pours), after any incident or near-miss, and after severe weather events. Some jurisdictions and contracts specify more frequent intervals.
Who is qualified to conduct a construction site safety inspection?
In most jurisdictions, the site manager or a designated safety officer can conduct routine site inspections. For formal regulatory inspections, a WHS/HSE inspector or an accredited auditor may be required. Insurance-related inspections are often conducted by qualified building surveyors or registered engineers. Always confirm qualification requirements in your jurisdiction.
What is the difference between a safety inspection and a building defect inspection?
A safety inspection focuses on active hazards — how work is being performed, whether equipment is safe, and whether workers face immediate risks. A building defect inspection assesses the physical quality and compliance of completed or in-progress construction elements, such as structural integrity, waterproofing, or finishes. Many sites benefit from both types conducted at different project milestones.
What standards apply to construction site safety inspections in Australia?
The primary framework is the Work Health and Safety Act 2011 (Commonwealth model, adopted in most states and territories) and the Work Health and Safety Regulations 2017. Guidance standards include AS/NZS 4801 (now largely superseded by ISO 45001), AS/NZS 3012 for electrical installations, and AS/NZS 1576 for scaffolding. State-based codes of practice from Safe Work Australia provide detailed practical guidance.
Can I use photos taken on a smartphone as legal evidence in a site safety dispute?
Yes, geotagged photographs taken on a smartphone are widely accepted as documentary evidence in Australian WHS prosecutions, UK HSE enforcement actions, and US OSHA proceedings, provided the metadata (date, time, location) is intact and the photographer can be identified. Using a dedicated inspection platform that timestamps and stores images with chain-of-custody records strengthens their evidential value significantly.
What does a construction site safety inspection typically cost?
For an independent inspection by a qualified safety consultant, costs in Australia typically range from AUD $300–$900 for a standard residential or small commercial site, and AUD $1,500–$5,000+ for large or complex sites. In the US, rates of USD $200–$600 per inspection are common for smaller sites. Internal inspections conducted by employed safety officers have no direct fee but incur labour cost — digitising the process with purpose-built tools reduces that overhead substantially.
Bottom line
A construction site safety inspection is not a compliance formality — it is the primary mechanism by which risk is identified, documented, and controlled before someone is hurt or a project is derailed. Done well, it protects workers, reduces liability exposure, and creates a defensible record that insurers, regulators, and courts respect.
The process is straightforward when you have the right preparation, the right checklist, and the right tools for documentation. If you're spending more time writing reports than inspecting sites, it's worth looking at how Inspectra AI can handle the reporting heavy lifting — so you can focus on what matters in the field.