
All articlesroof inspection
Flat Roof Inspection: A Complete How-To Guide
Inspectra AI Team September 21, 2026 11 min read
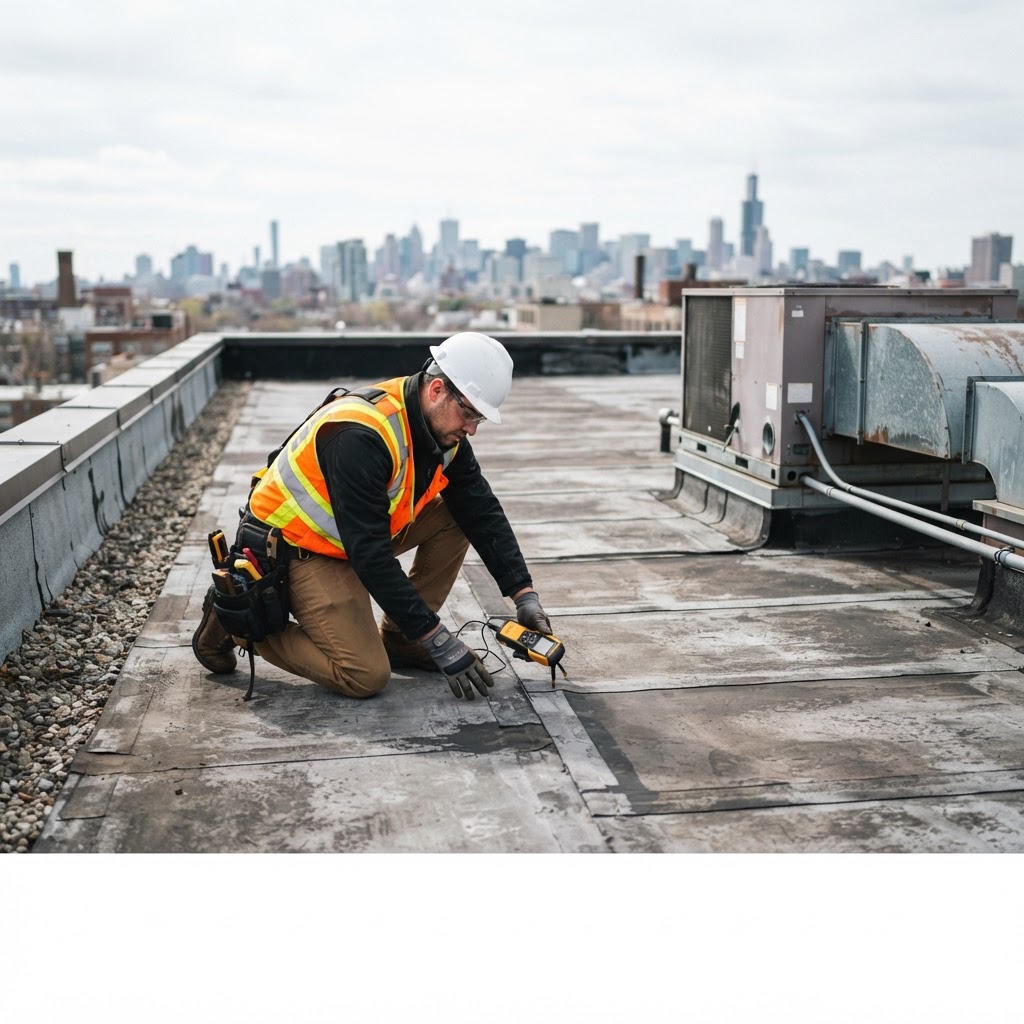
A flat roof inspection involves systematically assessing the membrane, drainage, flashings, penetrations, and substrate to identify defects before they escalate into water ingress or structural damage. Done correctly, it typically takes 45–90 minutes depending on roof size and complexity. Skipping any of these elements is how minor issues become five-figure repairs.
Flat roofs — technically low-slope roofs with a pitch below 10 degrees — behave differently from pitched roofs. Water does not naturally shed; it relies on designed drainage gradients (typically 1:80 minimum under AS 3500.3 and BS EN 12056-3) and outlets to evacuate. This makes them more susceptible to ponding, UV degradation, and thermal movement cracking than their pitched counterparts.
The membranes used — TPO (thermoplastic polyolefin), EPDM (ethylene propylene diene monomer), modified bitumen, or built-up roofing (BUR) — all have specific failure modes. Knowing what you're walking on before you start determines what you're looking for.
Before accessing the roof, collect:
This baseline prevents you from flagging intended design features as defects and helps you identify whether remediation work has been completed previously.
Flat roof inspections carry fall risk. Under the Australian WHS Act 2011, UK Work at Height Regulations 2005, and US OSHA 29 CFR 1926.502, any unprotected edge above 2 metres (or 6 feet in the US) requires edge protection or a fall-arrest system. Before stepping onto the roof:
| Item | Purpose | |---|---| | Moisture meter (pin and non-invasive) | Detect wet substrate without destructive testing | | Probe or awl | Test membrane hardness and delamination | | Tape measure | Quantify ponding areas, flashing height | | Binoculars | Assess hard-to-reach sections safely | | Camera or smartphone | Photo documentation at every defect | | Chalk or marking tape | Flag defect locations for trades | | Torch | Inspect drains, sumps, outlets |
Drainage failure is the leading cause of flat roof deterioration. Start here.
Roof outlets and drains: Each outlet should be free of debris, leaves, and membrane bridging. Run water from a bottle into the outlet — it should drain immediately. Slow drainage indicates partial blockage or inadequate pipe sizing.
Falls and ponding evidence: Walk the entire roof and look for tide marks, algae growth, or silt deposits — all indicate historic or current ponding. Measure the depth of any current standing water. Under most membrane manufacturer warranties, ponding exceeding 25mm for more than 48 hours constitutes a warranty exclusion event.
Overflow outlets (secondary drainage): AS 3500.3 and BS EN 12056-3 both require secondary overflow outlets positioned 25–50mm above the primary outlet level. Confirm they are present, unobstructed, and correctly positioned.
Gutters and downpipes: Where present, check for rust, separation at joints, sagging, and capacity. A blocked downpipe serving a flat roof is a faster path to interior damage than on a pitched roof because there is no natural overflow path.
This is the core of any flat roof inspection. The method varies slightly by membrane type but the defect categories are consistent.
Blistering: Air or moisture trapped beneath the membrane creates raised bubbles. Small blisters (under 150mm) may be stable; large or soft blisters indicate active moisture entrapment and require destructive testing to quantify.
Cracking and crazing: Oxidised bitumen membranes develop surface crazing with age — this is cosmetic until cracking reaches the reinforcement layer. Use your probe to test crack depth. Cracks penetrating to the reinforcement mat require immediate repair.
Delamination and lifting: Membrane edges, laps, and seams should be bonded flat. Run your hand along laps — any lifting or tent-edge is a water ingress point. For mechanically fastened TPO or PVC membranes, check seam welds every 3–5 metres.
Punctures and tears: Common around rooftop equipment, cable runs, and high-traffic zones. Photograph and measure every penetration.
Surface erosion (BUR and modified bitumen): Check that stone or gravel ballast is evenly distributed. Exposed felt or bitumen without ballast or coating has typically 2–4 years of remaining life depending on UV exposure.
Flashings — the metal or membrane upstands that seal junctions between the roof membrane and vertical elements — are statistically the most common source of water ingress on flat roofs.
Upstand height: Most standards require a minimum 150mm upstand above the finished roof level (FRL). Measure at parapet walls, abutments, and penetration flashings. Less than 150mm is a non-compliance.
Parapet wall flashings (coping): Check that coping caps are fully bedded, joints are sealed, and there is no cracking in the mortar or sealant. Coping that has lifted or shifted allows water to saturate the wall core, which then migrates to the ceiling below.
Penetration flashings (pipes, vents, HVAC): Each penetration should have a collar or boot flashing bonded to the membrane. Look for sealant that has shrunk away from the pipe, cracked collars, and unsupported pipe movement that has torn the flashing.
Internal gutter flashings: Where internal gutters run along parapet bases, check the junction between the gutter lining and the field membrane. This is a high-stress zone due to thermal movement and is frequently where long-term leaks originate.
The membrane sits on a substrate — typically concrete, compressed fibre cement, plywood, or rigid insulation board. Substrate failure undermines membrane performance regardless of membrane condition.
Moisture content: Use a non-invasive capacitance moisture meter across the full roof area. Flag any reading above 15–20% moisture content (tool-dependent — calibrate per manufacturer spec) for further investigation. Wet insulation has zero thermal value and accelerates membrane degradation from below.
Deflection: Walk the roof slowly. Any spring, bounce, or flex in the deck indicates delaminated substrate, saturated insulation, or structural issues in the supporting framing. This is a safety concern as well as a defect.
Roof edge condition: Check the fascia board or metal edge trim for corrosion, splitting, or separation from the roof deck. A failed edge detail allows capillary water ingress under the membrane termination.
HVAC units, solar panels, satellite dishes, exhaust fans, and pipe penetrations are all potential defect sources. For each:
If solar panels are present, cross-reference with your Inspectra AI report workflow — panel arrays significantly complicate membrane access and inspection, and this should be disclosed in the report.
A flat roof inspection is not complete without checking the interior ceiling below. Water ingress on flat roofs can travel laterally through insulation before appearing inside, meaning the leak location rarely sits directly above the ceiling stain.
Check for:
Document these and cross-reference them with roof defect locations in your report.
Not all defects carry the same urgency. A useful field framework:
| Priority | Definition | Example | Typical Action Timeline | |---|---|---|---| | Critical | Active water ingress or imminent failure risk | Torn membrane over occupied space | Immediate — within 48 hours | | Major | Defect likely to cause significant damage if unaddressed | Blocked primary outlet, delaminated flashing | Within 30 days | | Minor | Cosmetic or early-stage deterioration | Surface crazing, minor blistering | Scheduled maintenance cycle | | Monitoring | Defect stable but requires re-inspection | Small blister, hairline crack | Re-inspect at next scheduled inspection |
A well-structured report includes the defect location (with photo), defect type, priority classification, and recommended action. Using a platform like start a free trial with Inspectra AI lets you capture this in the field and generate a formatted, client-ready report without spending hours at a desk.
| Defect | Typical Repair Cost (AUD) | Typical Repair Cost (USD) | Typical Repair Cost (GBP) | |---|---|---|---| | Blocked drain clearance | $150–$400 | $100–$300 | £80–£250 | | Penetration flashing replacement | $300–$800 | $200–$600 | £150–£500 | | Membrane blister repair (per blister) | $200–$600 | $150–$450 | £100–£350 | | Partial membrane replacement (per m²) | $80–$180 | $60–$140 | £45–£110 | | Full roof replacement (per m²) | $120–$300 | $90–$250 | £70–£180 |
Costs are indicative ranges only and vary by location, access difficulty, and material specification.
Flat roofs should be professionally inspected at minimum twice per year — typically in spring and autumn — and immediately after severe weather events including hail, high winds, or heavy sustained rainfall. High-traffic commercial roofs with regular equipment access warrant quarterly checks.
Lifespan varies significantly by material: EPDM membranes typically last 20–30 years; TPO and PVC, 15–25 years; modified bitumen, 15–20 years; and traditional built-up roofing (BUR), 15–30 years depending on maintenance. Actual lifespan depends heavily on UV exposure, drainage quality, and maintenance frequency.
Most flat roofs can support a person, but fragile areas — including large-format skylights, unsupported fibreglass panels, and visibly compromised deck sections — must be avoided. Always confirm structural integrity before walking, use spread boards on suspect areas, and comply with applicable fall-protection regulations for your jurisdiction.
A standard flat roof inspection is a visual and manual assessment — it identifies visible defects and uses a moisture meter for indicative readings. A thermographic (infrared) survey uses thermal imaging to map temperature differentials across the roof, detecting moisture-saturated insulation that is invisible to the naked eye. For roofs with no recent leak history or to validate membrane replacement scope, thermography is a valuable add-on but is not a substitute for a physical inspection.
AS 4349.1-2007 (Inspection of Buildings — Property Inspections) is the primary standard governing property inspections in Australia. Material-specific standards also apply: AS 1562.3 covers flexible membrane roofing, and the NRCA Roofing Manual is widely referenced for commercial applications. Always confirm the applicable standard with your client or insurer.
Yes. If any portion of the roof was inaccessible — due to solar panels, HVAC equipment, safety risks, or locked access — this must be explicitly noted in the report as an inspection limitation. Failure to disclose limitations is a common source of professional liability claims against inspectors.
A thorough flat roof inspection follows a consistent sequence: drainage first, then membrane, then flashings, then substrate, then penetrations, then interior correlation. Skipping any element creates reporting gaps that can expose you to liability and leave your client with unresolved defects.
The difference between an average report and a defensible, professional one often comes down to documentation quality. If you're spending more time writing up your findings than you spent on the roof, it's worth looking at how Inspectra AI can streamline that process — from field capture to formatted report, in a fraction of the time.