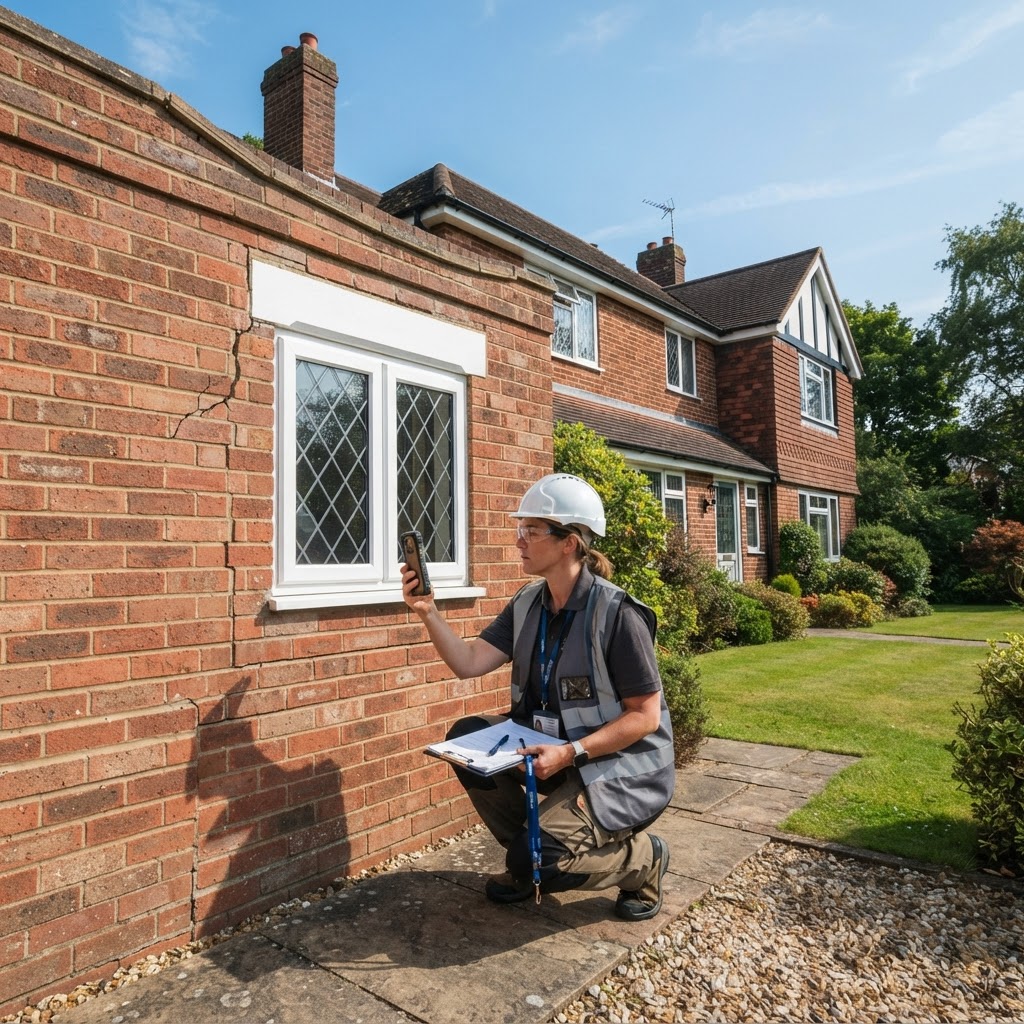
An insurance property inspection documents the current condition of a building to help underwriters assess risk or adjusters quantify a claim. A thorough, well-structured inspection reduces disputes, speeds up policy decisions, and protects all parties — inspector, insurer, and property owner alike.
Key takeaways
- Insurance inspections fall into two main types: underwriting inspections (pre-policy risk assessment) and claims inspections (post-loss damage assessment).
- Photographic evidence, measurements, and material specifications are the three pillars of a defensible inspection report.
- In Australia, AS 4349.0 sets out general requirements for property condition reporting; in the US, InterNACHI's Standards of Practice are widely referenced; in the UK, RICS guidance notes apply.
- Most underwriting inspections must be completed within 30–45 days of policy binding; many insurers require re-inspection every 3–5 years.
- Incomplete documentation is the leading cause of claim delays — a structured checklist eliminates the most common gaps.
Why insurance inspections demand a different approach
A standard maintenance inspection answers the question "what needs fixing?" An insurance inspection answers a different question: "what is the risk profile of this asset, and what is the cost to reinstate it?" That distinction shapes everything — from the level of photographic coverage to the way defects are described.
Underwriters want to know replacement cost value (RCV), construction type, occupancy, and exposure to hazards. Adjusters want to know the cause, scope, and dollar value of damage. Both audiences rely entirely on what the inspector documents in the field.
Insurance Property Inspection Checklist
Work through each section systematically. Flag any item you cannot access or assess — partial inspections must be declared in the report.
1. Site and property identification
- [ ] Full street address and legal property description (lot/plan number)
- [ ] GPS coordinates or pin on a mapping tool
- [ ] Property owner and insured party names
- [ ] Policy number or claim reference (if applicable)
- [ ] Date and time of inspection
- [ ] Weather conditions at time of inspection
- [ ] Inspector name, licence/certification number, and contact details
- [ ] Confirm access arrangements and any areas not inspected
Why it matters: Errors in property identification invalidate reports and can void claims. Confirm the address against official title documents before starting.
2. Building overview and construction details
| Item | What to record |
|---|---|
| Year of construction | Approximate or exact |
| Number of storeys | Including basement/subfloor |
| Gross floor area | Square metres or square feet |
| Wall construction | Brick veneer, double brick, timber frame, steel frame, ICF, etc. |
| Roof structure | Truss, rafter, flat, skillion |
| Roof cladding | Tile (concrete/terracotta), metal (Colorbond, Zincalume), membrane, slate |
| Floor construction | Concrete slab, suspended timber, steel decking |
| Window/glazing type | Single, double, laminated, heritage |
| External cladding | Render, weatherboard, fibre cement, brick, stone |
- [ ] Photograph all four building elevations
- [ ] Note any recent additions or alterations (additions without permits are a coverage risk)
- [ ] Record fire resistance level (FRL) ratings if visible on structural documentation
- [ ] Identify any heritage or listed status
3. Roof and roof space
The roof is the single highest-risk element in most property insurance claims. Allocate at least 25% of your inspection time here.
- [ ] Inspect roof cladding for cracked, missing, or displaced tiles/sheets
- [ ] Check ridge capping and hip capping mortar condition
- [ ] Inspect flashings at all penetrations (chimneys, skylights, vents, parapet walls)
- [ ] Check gutters and downpipes: blockages, corrosion, fall direction, overflow paths
- [ ] Inspect fascias and bargeboards for rot, impact damage, or paint failure
- [ ] Check roof space for moisture staining, pest activity (rodents, termites), and insulation condition
- [ ] Note any penetrations from solar panels, satellite dishes, or HVAC equipment
- [ ] Photograph all identified defects with a scale reference (ruler or coin)
- [ ] Record hail impact marks — note size (diameter in mm) and density per square metre
Standards note: In Australia, AS 1562.1 covers the design and installation of sheet metal roofing. In the US, refer to NRCA guidelines. In the UK, BS 5534 applies to slating and tiling.
4. Exterior walls and structure
- [ ] Check for cracking in masonry: record crack width (hairline <0.2 mm, fine 0.2–0.5 mm, medium 0.5–1 mm, wide >1 mm)
- [ ] Inspect mortar joints for erosion, spalling, or rising damp staining
- [ ] Check render for delamination, hollow sections, or impact damage
- [ ] Inspect external cladding for warping, rot, corrosion, or fire damage
- [ ] Check weep holes in cavity walls are unobstructed
- [ ] Inspect lintels above doors and windows for deflection or cracking
- [ ] Check damp-proof course (DPC) is intact and above finished ground level
- [ ] Note proximity of vegetation to the structure (root intrusion risk)
- [ ] Check retaining walls for lean, cracking, or drainage failure
5. Internal structure and finishes
- [ ] Inspect ceilings for water staining, sagging, or cornice cracking
- [ ] Check internal walls for cracking patterns (diagonal cracking at corners of openings indicates movement)
- [ ] Inspect floors for bounce, deflection, or surface damage
- [ ] Check all wet areas (bathrooms, laundry, kitchen) for waterproofing integrity, tile delamination, and grout failure
- [ ] Inspect subfloor space: ventilation, moisture, timber condition, pest activity
- [ ] Note any smoke damage, fire damage, or water damage — record extent in square metres
- [ ] Check door and window operation (sticking frames indicate structural movement)
6. Electrical systems
Insurance inspectors are not licensed electricians, but they must identify visible electrical hazards that affect insurability.
- [ ] Confirm switchboard is accessible and labelled
- [ ] Note whether residual current devices (RCDs / GFCIs) are installed
- [ ] Check for visible overloading, DIY wiring, or exposed conductors
- [ ] Note the age and type of wiring (aluminium wiring in properties built 1960–1980 is a known risk factor)
- [ ] Record presence of any solar PV system: panel count, inverter brand, and installation date
- [ ] Note any evidence of electrical fire or heat damage
Do not open the switchboard unless you hold the appropriate electrical licence.
7. Plumbing and drainage
- [ ] Check all visible pipework for corrosion, leaks, or lagging condition
- [ ] Test water pressure (normal range: 200–500 kPa residential in Australia; 40–80 psi in the US)
- [ ] Inspect hot water unit: age, type (storage, continuous flow, heat pump), condition, and relief valve presence
- [ ] Check stormwater connection points and surface drainage falls
- [ ] Inspect sanitary drainage vents on the roof
- [ ] Note any evidence of past water damage or sewage backflow
8. Fire safety systems
- [ ] Confirm smoke alarms are installed on each level (required in all Australian states; NFPA 72 in the US; BS 5839 in the UK)
- [ ] Record smoke alarm type (ionisation, photoelectric, combination) and test status
- [ ] Confirm interconnection of smoke alarms where required (mandatory for new builds in most jurisdictions)
- [ ] Check sprinkler system presence and last service date (commercial/strata properties)
- [ ] Note fire extinguisher type, last inspection tag, and location
- [ ] Record fire hydrant or hose reel presence and compliance plate
- [ ] Check fire doors for self-closing mechanism, intumescent seals, and correct fire rating
9. Site hazards and exposure
Underwriters price risk based on both the building's condition and its exposure to external hazards.
- [ ] Identify bushfire/wildfire attack level (BAL rating in Australia per AS 3959; IBHS designation in the US)
- [ ] Note flood zone classification (check local council flood maps or FEMA NFIP data)
- [ ] Check distance to coast or tidal waterway (storm surge and corrosion risk)
- [ ] Note site slope and evidence of soil movement or subsidence
- [ ] Identify hazardous materials: note any suspected asbestos-containing materials (ACMs) — do not sample without appropriate PPE and licensing
- [ ] Record proximity to commercial operations, fuel storage, or industrial sites
- [ ] Note security measures: fencing, locks, CCTV, alarm system type
10. Outbuildings and ancillary structures
- [ ] Garage or carport: construction type, condition, door operation
- [ ] Sheds: structural integrity, contents type (flammable storage is a rating factor)
- [ ] Swimming pool: fencing compliance, equipment condition, structural integrity
- [ ] Retaining walls: height, condition, drainage
- [ ] Fences: type, condition, shared boundary fences
- [ ] Driveways and paths: trip hazards, structural cracking
11. Photographic and documentation standards
Photos are the backbone of any insurance report. Follow these standards:
- Minimum resolution: 12 megapixels; photos must be geotagged and timestamped
- Capture an establishing shot (whole elevation or room), a mid shot (zone of concern), and a close-up (defect detail with scale reference)
- Do not edit or filter photos — use originals only
- Label each photo with a corresponding reference to the report section
- For claims inspections, photograph damage before any make-safe works begin
- Capture at least one photo per checklist item where a physical condition is being assessed
12. Replacement cost estimate (underwriting inspections)
For underwriting inspections, the insurer needs a reinstatement cost — not market value.
- [ ] Record gross floor area (GFA) accurately — this drives the cost per m² calculation
- [ ] Identify construction quality category: standard, medium, high, heritage/custom
- [ ] Note any features that increase reinstatement cost: ornate cornices, imported tiles, polished concrete floors, hydronic heating
- [ ] Reference current construction cost benchmarks (e.g. Rider Levett Bucknall quarterly cost data; CoreLogic RCT in Australia; Marshall & Swift in the US)
- [ ] Do not conflate market value with replacement cost — they can differ by 30–50% in high-demand urban markets
Turning your checklist into a defensible report
A completed checklist is raw data. A defensible insurance report organises that data into a structured narrative that answers the insurer's specific questions. The report should:
- State the scope clearly — what was inspected, what was not, and why.
- Use objective language — "3 mm diagonal crack at north-east window corner" not "significant cracking."
- Attribute cause where possible — settlement, impact, water ingress, deferred maintenance.
- Distinguish existing conditions from new damage (critical for claims).
- Include a condition summary with a risk rating or urgency classification.
Tools like Inspectra AI allow field inspectors to capture photos, voice notes, and observations on site, then generate structured, professional reports that meet insurer documentation standards — without spending hours at a desk.
Frequently Asked Questions
What is the difference between an underwriting inspection and a claims inspection?
An underwriting inspection assesses a property's risk profile before or during a policy period — it informs how the insurer prices and conditions the policy. A claims inspection occurs after a loss event and documents the nature, cause, and extent of damage to support a claim settlement.
How long does an insurance property inspection take?
A residential property inspection typically takes 1.5–3 hours on site, depending on property size and complexity. A commercial or strata building can take a full day or more. Report writing adds 1–2 hours for a well-organised inspector using digital tools.
Do I need special qualifications to conduct insurance inspections?
Requirements vary by jurisdiction. In Australia, property inspectors are typically licensed builders or qualified building consultants under state legislation. In the US, InterNACHI or ASHI certification is common. In the UK, RICS membership is the recognised credential. Some insurers maintain their own approved inspector panels with additional requirements.
What happens if I miss something during an insurance inspection?
Omissions can expose the inspector to professional liability claims, delay or void policy coverage, and undermine claim settlements. Professional indemnity (PI) insurance is essential for anyone conducting insurance inspections. A structured checklist and thorough photographic record are your primary defences.
How often should a commercial property be re-inspected for insurance purposes?
Most commercial insurers require a physical inspection at policy inception and every 3–5 years thereafter, or after any major renovation, change of use, or loss event. Some high-value or high-risk properties are re-inspected annually.
Can I use photos taken on a smartphone for insurance inspection reports?
Yes, provided the photos meet resolution requirements (minimum 12 MP), are geotagged, timestamped, and unedited. Many modern smartphones are adequate. Dedicated inspection apps that automatically embed metadata are preferable to a standard camera app.
Bottom line
A rigorous insurance property inspection is built on systematic documentation, objective language, and comprehensive photographic evidence. Use this checklist as your field guide — work through every section, record what you find, and flag what you cannot access. The quality of your report directly affects outcomes for underwriters, adjusters, property owners, and your own professional reputation.
If you want to spend less time writing and more time inspecting, start a free trial of Inspectra AI and see how fast a field-ready report comes together.