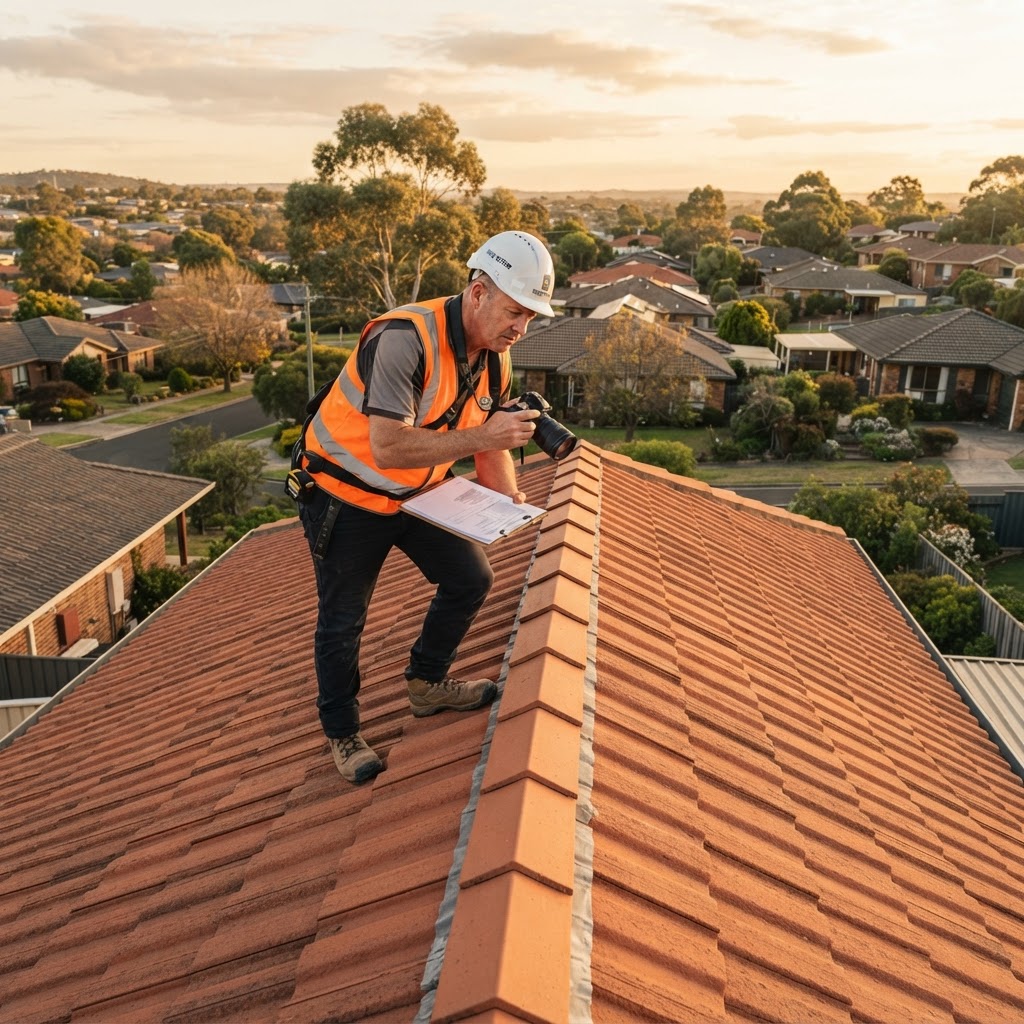
A thorough roof inspection involves systematically assessing every component from the ridge line to the gutters, documenting defects with photo evidence, and producing a report that supports maintenance decisions or liability claims. Skipping a structured approach leads to missed defects, callback jobs, and disputes. This step-by-step guide gives field inspectors, property managers, and construction professionals a repeatable process that meets the requirements of AS 4349.1-2007 (Australia), InterNACHI Standards of Practice (US), and RICS Home Survey Standard (UK).
Key Takeaways
- A complete roof inspection covers eight zones: ridge, roof cladding, flashings, penetrations, eaves/fascia/soffit, gutters/downpipes, sarking/underlay, and the ceiling space below.
- Australian standard AS 4349.1-2007 classifies defects as major (requiring urgent rectification) or minor (maintenance items); US inspectors follow InterNACHI SOP Section 3 for roofing; UK surveyors use RICS condition ratings 1–3.
- Most residential roof inspections take 45–90 minutes on site; complex commercial roofs or multi-storey buildings can take 3–4 hours.
- Re-roofing a standard Australian home costs between AUD $8,000 and $25,000; partial repairs typically range from AUD $500 to $3,500. US equivalents sit at USD $6,000–$22,000 for full replacement.
- Consistent photo documentation — minimum one wide, one mid, one close-up per defect — is the single biggest factor in dispute resolution.
What to Do Before You Climb
Review the Property File
Before arriving on site, pull any available records: council-approved plans, previous inspection reports, strata maintenance logs, or insurance claim history. Knowing that a flat membrane roof was installed in 2015, for example, tells you to look closely for end-of-warranty delamination. If the client has a defect liability period (the contractual window — typically 12 months in Australia and the US, up to 24 months under some UK building contracts — during which the builder must rectify faults), flag this in your pre-inspection notes.
Check the Weather and Schedule Accordingly
Never inspect immediately after heavy rain if standing water could obscure drainage problems, but do inspect soon after rain to observe active leaks or moisture staining. Wind speeds above 40 km/h (25 mph) are a legitimate safety reason to defer a roof walk. In Australia, check Bureau of Meteorology forecasts; in the US use NOAA; in the UK use the Met Office.
Confirm Access and Safety Requirements
- Ladder: Minimum 1 m above the roof edge per safe work guidelines (Safe Work Australia Code of Practice for Working at Heights; OSHA 1926.1053 in the US).
- PPE: Non-slip footwear, hard hat where there is overhead risk, high-vis vest on commercial sites.
- Drone option: For steep-pitch or inaccessible roofs, a Part 101 (Australia) / Part 107 (US) / CAA GVC (UK) compliant drone survey is a legally accepted alternative for visual inspection. Cite limitations in your report.
- Notify the occupant that you will be on the roof and confirm utility isolations where required.
Step 1 — Ground-Level Visual Survey
Begin at the boundary and walk the full perimeter. This provides context that close-up inspection misses.
What to look for:
| Observation | Likely defect |
|---|---|
| Sagging ridge line | Rafter or purlin failure, ridge board rot |
| Uneven or wavy cladding profile | Tile slippage, sheet fixings failed |
| Missing tiles or sheets visible from ground | Impact damage, wind uplift |
| Staining on external walls below eaves | Blocked or leaking gutters |
| Vegetation growth on roof surface | Moisture retention, blocked valleys |
Photograph the four elevations — north, south, east, west — as orientation shots. These become your report's reference images.
Step 2 — Roof Cladding Assessment
This is the largest surface area and typically the first place water enters. Assess according to the dominant material.
Concrete and Terracotta Tiles (Common in Australia and UK)
- Check for cracked, broken, or slipped tiles. Under AS 4349.1-2007, any tile that is cracked through is a major defect if it allows water ingress.
- Look for efflorescence (white mineral deposits on tile surfaces) — a sign of prolonged moisture retention.
- Test ridge capping mortar by gently pressing. Soft or hollow-sounding mortar indicates repointing is needed; budget AUD $1,500–$4,000 for a standard home.
- Inspect valley tiles or valley iron for rust, debris build-up, or cracking.
Metal Roofing — Colorbond, Zincalume, Corrugated Iron
- Look for corrosion at cut edges and screw penetrations. Screws missing rubber washers are a common and under-reported defect.
- Check lap joints for lifting or separation.
- Assess for oil-canning (visible waviness in flat panels) — cosmetic unless combined with ponding.
- Note the gauge and profile; non-original replacement sheets indicate prior repair work.
Flat and Low-Slope Roofs — TPO, EPDM, Torch-On Bitumen
- Inspect membrane (a continuous waterproof layer) for blistering, cracking, lap-seam separation, and ponding water. Ponding lasting more than 48 hours after rain accelerates membrane degradation.
- Confirm that outlets are not blocked; RICS guidance requires positive drainage across the full membrane surface.
- Check parapet flashings and coping stones for movement or open joints.
Step 3 — Flashings and Penetrations
Flashings are the thin metal or polymer strips that seal the junction between the roof and any vertical surface — walls, chimneys, skylights, vent pipes. They account for a disproportionate share of water ingress claims.
Inspect every flashing for:
- Separation from substrate (visible gaps wider than 3 mm should be recorded as a defect).
- Rust staining or corrosion on steel flashings.
- Sealant that has cracked, shrunk, or pulled away. Silicone sealant has an effective lifespan of 10–15 years; reliance on sealant alone (without mechanical fixing) is a defect under AS 4349.1.
- Counter-flashings embedded in masonry — check that lead or aluminium is not displaced.
Penetrations checklist:
- [ ] Plumbing vent pipes — rubber boot intact?
- [ ] Exhaust fan outlets — damper present and functional?
- [ ] Skylights — kerb height minimum 150 mm above roof surface (AS 1562.1 requirement)?
- [ ] Solar panel mounting brackets — sealant condition and any tile cracking under frames?
- [ ] Evaporative cooler or HVAC units — curb flashing sealed, condensate draining correctly?
Step 4 — Eaves, Fascia, Soffit, and Bargeboards
These components are frequently overlooked but provide critical early warning of concealed issues.
- Fascia boards: Probe with a moisture meter (threshold: above 20% moisture content in timber is a concern; above 28% indicates active decay risk per AS 1720.1). Soft spots detected by probing indicate rot.
- Soffit lining: Look for staining, paint bubbling, or sagging that indicates water has tracked back from the gutter or through the roof.
- Ventilation: Many older Australian homes have inadequate soffit ventilation, accelerating sarking and rafter deterioration. Record the number and size of vent openings.
- Bargeboards (the boards running along the gable ends): Check for paint failure and end-grain exposure — the most vulnerable point for moisture entry.
Step 5 — Gutters and Downpipes
Blocked or undersized gutters are among the most common causes of property water damage, yet they are one of the cheapest things to maintain.
Systematic gutter inspection:
- Clear debris if safe to do so, or note it as an obstruction in your report.
- Check fall: Gutters should have a minimum 1:500 fall (2 mm per metre) toward the downpipe outlet. A string line or spirit level confirms this quickly.
- Inspect joints and stop ends for rust, separation, or silicone repair — an indication of past overflow.
- Assess gutter profile size against roof catchment area. AS/NZS 3500.3 provides sizing tables; undersized gutters on large roof areas are a defect.
- Downpipes: Confirm they discharge to a stormwater system, not onto the slab or against a foundation. Trace each downpipe to its outlet.
- Leaf guards: Note whether installed and in what condition; not a mandatory item but affects maintenance frequency.
Common defect: overflow staining on external walls. Photograph the full extent. This is evidence for insurance assessors and owners.
Step 6 — Sarking and Roof Underlay
Sarking is the reflective foil or breathable membrane installed beneath roof tiles or metal sheeting. In Australia, AS 4200.1 covers sarking materials and AS 4200.2 covers installation.
- Access from inside the roof space or through any inspection hatches.
- Look for tears, gaps at laps, and UV degradation (foil sarking exposed to sunlight becomes brittle within 18–24 months).
- Check that sarking is lapped correctly — 150 mm minimum horizontal laps, 300 mm at valleys per AS 4200.2.
- Note whether sarking is present at all; its absence on a post-2004 Australian dwelling is a non-compliance flag worth recording.
Step 7 — Ceiling Space and Internal Evidence
The roof space (also called the roof void or attic) often contains the clearest evidence of roof failure.
What to assess:
- Active leaks or staining on top-chord members (the structural timber framing) — photograph and measure the extent.
- Timber condition: Look for fungal growth (dark staining, musty odour), borer damage (fine dust and small holes), and structural cracking in rafters.
- Insulation: Wet or compressed insulation batt is evidence of past or current leaking. Record R-value rating if visible — Australian minimum for Zone 4 (most of NSW, Vic, WA) is R3.5 in ceilings per NCC 2022 Section J.
- Ventilation: Adequate cross-ventilation in the roof space reduces condensation risk. Blocked or absent vents contribute to timber decay.
- Ceiling stains from below — if accessible, match ceiling stains to roof penetrations above.
Step 8 — Documenting and Reporting
Photo Protocol
For every defect, capture three images:
- Wide shot — shows the defect in context (which part of the roof, which elevation).
- Mid shot — identifies the specific component affected.
- Close-up — shows the nature and extent of the defect clearly.
Add a timestamp and GPS tag where possible. This metadata matters in insurance and legal disputes.
Defect Classification
Use a consistent classification system aligned to the standard applicable in your jurisdiction:
| Jurisdiction | Classification system |
|---|---|
| Australia | AS 4349.1: Major defect / Minor defect / Maintenance item |
| US | InterNACHI SOP: Safety hazard / Defect / Recommendation |
| UK | RICS: Condition Rating 1 (no action) / 2 (repairs needed) / 3 (urgent) |
Estimated Rectification Costs
While many inspection standards prohibit cost estimates in standard reports, clients consistently find them useful. If you include them, label them as indicative and recommend three trade quotes. Typical Australian ranges:
- Ridge repointing: AUD $1,500–$4,000
- Flashing replacement (single penetration): AUD $300–$800
- Gutter replacement (standard dwelling): AUD $1,800–$5,000
- Full re-roof (concrete tile, standard dwelling): AUD $12,000–$22,000
Streamlining Your Workflow with Technology
Field inspectors using paper checklists and manual report writing spend an average of 2–3 hours post-inspection on documentation. Platforms like Inspectra AI allow you to capture photos and voice notes on site and generate a structured, professional report automatically — reducing report turnaround from hours to minutes. Human review remains part of the process, keeping accuracy and professional accountability intact. If you handle volume roof inspections, it is worth considering whether to start a free trial to test the time saving on your next job.
Frequently Asked Questions
How often should a roof inspection be carried out?
For residential properties, a visual inspection every 2 years is a reasonable baseline, with an inspection after any significant storm event. Commercial roofs and flat membrane roofs should be inspected annually given their higher maintenance requirements and consequence of failure. Insurance policies in Australia and the US commonly require documented evidence of regular maintenance.
Do I need to walk on the roof to inspect it?
Not always. Many inspectors complete a compliant inspection using ladder access at the eaves, binoculars, or a drone for inaccessible or steep-pitch roofs. The key requirement under AS 4349.1, InterNACHI SOP, and RICS HSS is to inspect